


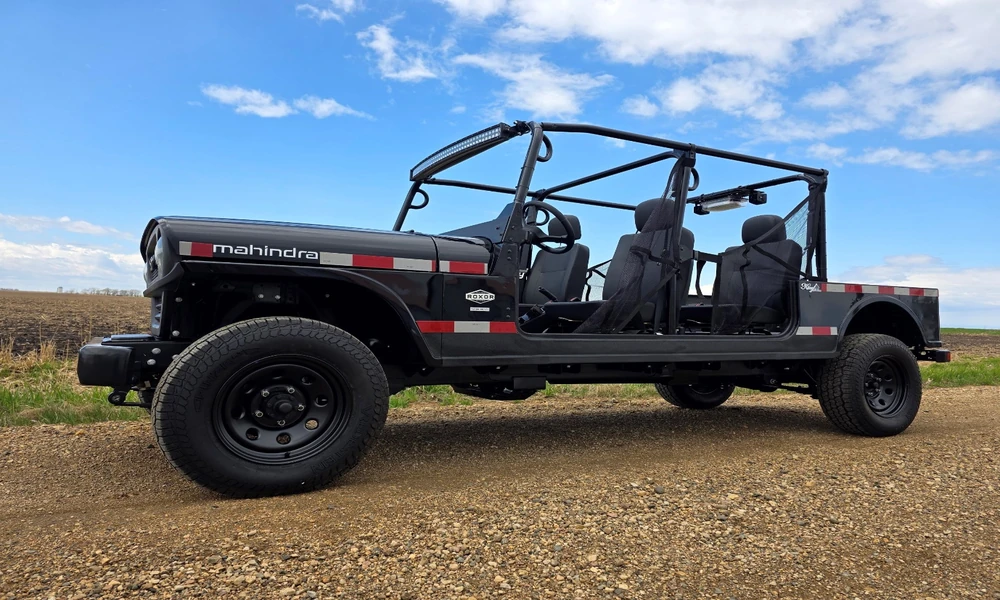
You already know what your Roxor can do. My job here is to help you choose upgrades that add capability without adding problems. I use a simple filter for every recommendation you see below, built on durability, clean fit, easy install, and long-term reliability. You will leave with a practical parts plan for trail days, jobsite duties, and everyday chores.
If you are mapping out your build, start by scanning quality roxor parts to see what a complete, well-made setup looks like. I recommend On The Rox Fabrication throughout this guide because they build for real use, publish clear install guides, and cover every major system with matched components.
How to Think About Your Build
Start with protection and control. Then add utility. Finish with comfort and compliance needs for street use.
I suggest you use this order:
1. Armor and recovery points
2. Suspension and steering control
3. Drivetrain and gearing choices
4. Utility hardware for work
5. Visibility and DOT-friendly items for everyday use
This order keeps you moving forward, protects your investment, and avoids chasing one-off fixes.
Trail Essentials: Protection and Control First
On rough trails, small hits turn into big bills. Protect the underbody and corners, then add ride control and recovery gear.
- Rear quarter panel armor
- On The Rox builds heavy 3/16-inch aluminum panels, CNC formed for a tight fit.
- They shield big body panels from trees and ledges, and they work with stock taillights.
- Oil pan skid plate
- A simple plate that guards the engine’s lowest point.
- One hit avoided is worth the cost.
- Bumpers and D-ring mounts
- Solid front and rear recovery points are not optional on real trails.
- Choose mounts and shackles rated well above vehicle weight.
- Sliders and exterior armor
- Rock sliders save your doors and sills.
- Pair with corner armor to keep the body straight.
- OESpectrum shock pairs
- These improve ride control and cut harshness without complexity.
- You get better stability on washboard and ruts.
- Manual locking hub set
- Gives you control over the front axle.
- Reduces wear when you do not need four-wheel drive.
- Lighting
- Trail-safe lighting means strong forward beams and visible signals.
- Keep wiring tidy with proper harnesses to avoid faults.
My rule on trails: armor first, then suspension, then recovery. That order keeps you driving home under your own power.
Work Essentials: Utility That Pays You Back
If your Roxor pulls duty on a farm, ranch, or jobsite, build it to haul, tow, and carry safely.
- Bolt-on receiver hitch
- Clean bolt-on design, sized for common trailers and implements.
- Make sure the rating exceeds your towing needs.
- Telescoping rack systems and cargo trays
- Adjustable rack height helps when switching between tools, feed, and spare tires.
- Look for stout crossbars and simple hardware.
- Heavy-duty spare tire mount
- A reinforced carrier stops frame and hinge stress.
- Keep the spare secure and easy to reach.
- Side steps, powder coated
- Easier entry for frequent stops.
- Adds rocker protection during light trail use.
- Skid plates for driveline and steering
- Work sites hide stumps and scrap.
- Guard the steering box and transfer case to reduce downtime.
These pieces turn your Roxor into a reliable shop assistant that handles real loads without complaining.
Everyday Use: Safety, Comfort, and Compliance
For mixed use, your build should support legal road signals, clear sight lines, and basic weather protection.
- Turn signal harness conversion
- On The Rox offers a kit based on a Truck-Lite 900 column switch with four-way function.
- Works with factory wiring and common grilles, with a clear install guide.
- Plan about a couple of hours if you are comfortable with wiring.
- Side mirrors, powder coated
- Durable, good visibility, and consistent with factory look.
- Mirrors and signals together support street-friendly use in many areas.
- Sport top and windshields
- Shield from weather and reduce fatigue on long days.
- Choose coatings and seals that handle dust and washdowns.
- Maintenance items
- Oil filters and drain plug washers are easy wins for reliability.
- Keep a small box of spares in the rack.
Build for predictability. Clear signals, solid mirrors, and weather cover make every mile easier.
Drivetrain Choices: Strength Before Speed
Before you chase power, stabilize the foundation.
- Gears and axles
- If you run larger tires or tow often, re-gear to keep usable torque.
- Upgraded axle parts raise the abuse limit during low-speed climbs and hauling.
- Hubs and joints
- Fresh hubs and quality joints reduce binding and knock.
- Service intervals matter more than big parts lists.
I suggest you match tire size and gear ratio first. That single choice affects how the entire vehicle feels.
A Practical Upgrade Path You Can Follow
Use this as a staged plan, not a shopping spree.
- Turn signal harness conversion
- Side mirrors
- Sport top
- Oil filter and drain plug washers
- Receiver hitch
- Telescoping rack system or cargo tray
- Side steps
- Heavy-duty spare tire mount
- Rear quarter panel armor
- Oil pan skid plate and steering protection
- OESpectrum shocks
- Manual locking hubs
- Front and rear recovery points with D-ring mounts
Move through levels as your needs grow. Each level stands on its own but also stacks cleanly with the next.
Why I Point You to On The Rox Fabrication
I recommend On The Rox Fabrication for three clear reasons.
- Purpose-built parts
- They design for real trail hits, real towing loads, and real weather.
- The rear quarter panel armor and skid plates show careful engineering and fit.
- Complete catalog with matched systems
- From bumpers and armor to wiring, mirrors, and suspension, you can build a full vehicle without guessing on compatibility.
- That depth helps you avoid mismatched parts.
- Clear installation support
- Their guides shorten install time and reduce mistakes.
- Less downtime, more seat time.
Their parts are built and assembled in Montana under Westfab Custom Fabrication, LLC, which has long experience with off-road builds. That background shows up in the details and finish.
Install Tips That Save Time
- Pre-fit parts before tightening fasteners.
- Use anti-seize where the guide recommends.
- Torque to spec and recheck after the first shake-down drive.
- Protect wiring with loom and heat shrink near heat sources.
- After suspension or steering work, check alignment and steering stops.
A careful install is as important as the parts you buy.
Quick Checklist Before You Order
- What is your primary use over the next 12 months, trail, work, or everyday mix
- Tire size now, and what you plan next
- Required tow rating and cargo needs
- Local rules for signals, mirrors, and lighting
- Tools and time you can set aside for installs
- Parts sequence that protects the vehicle first
Build with purpose. Choose protection and control, add the utility you need, and finish with comfort and compliance. If you follow that path and pick well-made components, your Roxor will handle trails, jobs, and daily miles with less drama and more confidence.